HELLO my name is Heather

  • |

    Little Drawers, Little Breads

    Greendrawershb

    My parents just moved to a new home this month. And, lucky me, my mom brought me this little chest of drawers she didn’t want to take with her. I have a thing for small chests of drawers. When I get my studio sorted out and photographed, you’ll see what I mean.Littledrawersbefore This little number is the best one yet.  It’s a perfect notion-keeper. Each drawer is divided into four sections and the drawers don’t fall out when you pull on them. All it needed was a happy color — a great excuse to use the green spray paint I bought a while back. I’m just tickled to have it all done.  No fretting or planning, just one impulsive, “I think I’ll go paint this thing!” — and voila!

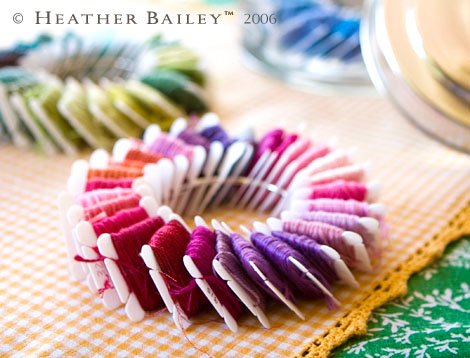
    Now I’m going to go fill it with needles and thimbles, fray check and seam rippers, and all manner of happy things — a much-needed respite from dancing with desks.

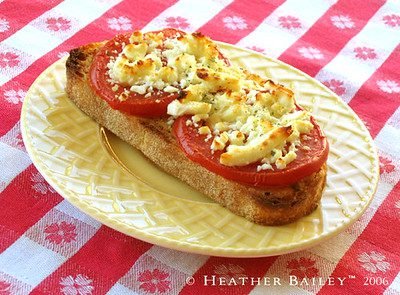
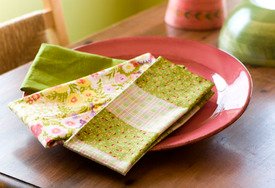
    On a different note, this is what I made for dinner last night, Little Breads. Yes, Little Breads – a ridiculous name, I know. I make this for dinner when I want something yummy, decently healthy, AND super easy. I never thought of my creation as a recipe until I learned that my sister, Julia, had adopted it for a regular meal and her husband had given it the official name, “Little Breads.” Brent has an odd, yet unaffected sense of humor, which I much appreciate and must endorse, so the name is indeed official. ‘Recipe’ here.

    Note to self: Track down Brent’s poem about flies & see if he’ll let me share it.

  • The Shuffle Kerfuffle

    I’m eager to sew more — really ready. I’ve spent a lot of time on the computer this year — a fact that’s reflected in the arrangement of my studio.  My computer table has been in a prime position and easily accessed. Extra papers, packages and put-aways have accumulated on the neglected sewing table, further securing the table’s second billing. I have a brand new Bernina Artista 640 that I’ve only used twice so far (to make this and these) and a complete set of Isacord thread that I have yet to unbox and find a place for. They’ve been nagging at me like bored and hungry children, “Play with me. Feed me.” Well, enough already! It’s time to rearrange my studio.

    Isacordthreadhb

    Okay, so I dropped what I was working on and spent a good chunk of the week shuffling furniture. I was hoping to find a configuration that would allow more workspace for sewing and better storage, yet make space for my computer to stay in the room. Sounds possible, right?  But, days later, I’ve moved armoires and tables and a chest of drawers and I still haven’t figured it out! *so frustrating* We’ve been to several stores in pursuit of a tempting solution as well. In my mind now, the furniture options are waltzing around the room as I try to sort out the arrangement. Not the worst problem to have, true, but I have other things to do than spin in circles. That being said, I’ve decided to roost on it, at least for a couple of days — let it be.

    Also, let me add that the fabulous collection of thread comes from the ever-generous Elinor, my mother in law. She spoils me and then she spoils me again. Elinor is teaching her first online class over at Cloth Doll Connection — now anyone in the world can see what the fuss is all about: flat fairies, indeed. Love you, mom, thanks!

  • My Favorite Knot

    Knot12c

    Every few years a sewing tip or trick comes my way that greatly improves my creative experience. I used to knot my thread by wrapping it around my finger, rolling it with my thumb, then tugging the length to form an unpredictable mass at the end of my thread. The result was often waddish and loopy — a small, but frequent frustration. 

    Then, a few years back, I learned a knot that has never failed me. I love this knot, all perfect and tidy. In the spirit of sharing, I’ve put together a tutorial of My Favorite Knot to spread the joy.

    Don’t bother with a magnifying glass, the photo collage is just a fun preview. To read step-by-step instructions, with larger photos, visit the My Favorite Knot link under Freebies at HeatherBailey.com. Practice until you’ve got it down, it’s worth it. Have fun!

    Favoriteknotcomposite2

  • Peekaboo Polly

    This is the most ridiculous apron — I just love it! The embroidery is all chunky and gawky and the sewing is worse (though you can’t tell from the photos, Miss Ta-Da and the pleats above her are a couple of inches off from where they’re supposed to be).  But, the kicker, of course, is her flip-up skirt with matching panties! She had to be mine.

  • A Steady Drip

    BabyshirtflowerhbHey everyone — thanks for all of the excitement over the Sweet Summertime shirt for my daughter. Yes, I made the pattern, so I don’t have a pattern number for you — so sorry 🙁  However, I am planning to publish some patterns this fall. I have lots of ideas in the works, but I’m totally open to suggestions. If you’re just dying to have a pattern for any of my personal projects (like the shirt), certainly give a holler. A little positive pressure just might do the trick! 

    Getting there — today I drafted the pieces for what will likely be my first published pattern — a ruffly apron for girly-girls. I’m planning to draft a second design to go with it and grade the two designs into 2-3 sizes to cover all ages. It’ll likely be a couple of months before I take any patterns to the printer — I’m hoping to have a number of designs ready to go at once — but when I do, you’ll be the first to know.

    Again, thank you for your encouragement, a steady drip of affirmation — LOVE this blog thing!

  • The Sugar Shop

    Jarsverticalhb

    I keep a lot of my sewing supplies in old-fashioned glass jars. Not only can I see where everything is, but my supplies look delicious this way. They call to me, “Heather, Heather, come play with us!” Several of these fun jars line the high shelves of my studio – with pink walls and distressed white furniture, my studio is a virtual candy store, hence the nickname above!

    3ringshb_2

    There are many systems for organizing embroidery floss, involving cases, binders, hinged rings, zippered baggies, plastic cards or any combination of these. I prefer the hinged rings. I can clearly see my colors, without a lot of extra ‘packaging.’

    I record the color #s on the end of the plastic cards with a permanent marker. In the off-chance I need to replenish a specific color mid-project, I’ll know what to get. When I’m traveling with a project, I detach all of the necessary cards and group them onto a new ring. The best part? The rings easily stack in their jar, where I can drool over the colors at will.

    For me, creatively, it’s important to see my supplies. A random arrangement of spools in a jar might inspire a new approach to color or a unique patchwork design.  The same goes with buttons or stacks of fabric. When your supplies are in a snarl and tucked away in a shoebox (as were my threads a few years back), you’re limiting your creative resources. Attack one category at a time: fabric, thread, trims, buttons, etc. Rent a good movie and enjoy the monotony of it all.

    Die1_1

    Personally, I still need to sort out my trims. I’d like to wrap them around these chipboard cards and line them all up on a shelf, keeping extra cards on hand for future trim binges. But, I haven’t discover a resource for these gems. If anyone knows where to get ahold of a stack of these, PLEASE let me know! I have a back-up plan involving corrugated plastic, but I’m holding out for Plan A.

    Yes, I have far more supplies than my space allows for and not everything is neat and tidy. But, every effort I’ve made at organization has proven well worth my while. In fact, I’m sure there are some fantastic forehead-smacking ideas out there in blogland. Tell me your favorite tricks — I’d love to hear how you keep your supplies
    in check!

  • Play Time!

    Thank you everyone for your cheerful comments — I came home to a mailbox plump with kindness! I’m glad to see that the Bitty Booties™ pattern is such a hit and that successes are being flaunted. If you haven’t taken a peek at the Bitty Booties™ Gallery yet, you should. Frogs on toes, hearts on soles, leather flowers – lots of fun ideas!  Loving them! And be sure to add your goodies into the mix.

    I have a number of ‘business’ projects in the works. In the next little while, I need to design my website, master my new Bernina Artista 640, write an article for Sew News and design some irresistable patterns. (I just love how the line between work and play can be so blurry these days.) I’m waiting for some return phonecalls on most of these to-dos, which has left me tapping my toes most of the day. 

    Enough of that now, I’m going to sew something fun! I pulled these funkies from my stash and I’ve resolved to make a summery shirt for Charlotte. I take it if I announce a project on my blog, then I must get it done. That’s how it works, right? The middle fabric is a vintage piece from who-knows-when and the top piece is from Japan, I believe. I threw in the avocado jacquard for good measure (my favorite color), though I don’t know if it’ll get used. I’m going for a sleeveless, tanky-type top. I’ll have the bodice gather into a yoke, and add some straps at the shoulders. I might even gather up the waist with elastic thread in the bobbin. Hmmm…I’ll work out the details as I go. 

    Off to play!

  • |

    The New York ‘Post’

    Guess where I’ve been this week!  Times Square, Rockafellar Center, The Metropolitan Museum of Art, Central Park, Greenwich Village, Soho, Washington Square, Union Square, The Empire State Building and Free Spirit – a virtual travel guide to New York City. The strike-offs for my new line of fabric with Free Spirit are in from the mill. I flew in to review the colors in depth, hang out with the ladies and enjoy a weekend traipsing around with my mother. Flagrant fun! 

    To hear more about my trip and a sneak preview of my fabric, click here.

  • Bitty Booties™

    Bitty Bootmakers, it’s your day! The free baby shoe pattern is yours…all yours. You won’t believe how easily these go together too. Never one to stick to the directions myself, I’ve included lots of ideas for how to customize the design. So, be sure to read through the entire pattern before gathering your materials. I’m expecting big little things! Download your copy by clicking the “Bitty Booties” link here. (Or navigate to “Freebies” at HeatherBailey.com).

    Join the “Bitty Booties” photo group and show your stuff — I can’t wait to see what you come up with!

    Redbootieshb

    Turquoisebootieshb