
Every few years a sewing tip or trick comes my way that greatly improves my creative experience. I used to knot my thread by wrapping it around my finger, rolling it with my thumb, then tugging the length to form an unpredictable mass at the end of my thread. The result was often waddish and loopy — a small, but frequent frustration.
Then, a few years back, I learned a knot that has never failed me. I love this knot, all perfect and tidy. In the spirit of sharing, I’ve put together a tutorial of My Favorite Knot to spread the joy.
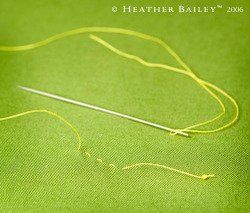
Don’t bother with a magnifying glass, the photo collage is just a fun preview. To read step-by-step instructions, with larger photos, visit the My Favorite Knot link under Freebies at HeatherBailey.com. Practice until you’ve got it down, it’s worth it. Have fun!

Great tutorial! My quilting teacher uesd this knot but never really explained it well and I could never replicate it later. Thanks so much for putting this online!
thanks for this! i also use the thumb rolling knot technique and don’t always enjoy the results. next time i’m hand sewing or embroidering, i’ll have to give your method a try.
Thank you!
Making a tidy knot with my thread has frustrated me since I was little bitty.
Hopefully I will be able to master this method.
I just found your blog last week, and I’m really enjoying it!
That’s perfect for quilting. I do the same knot, both at the beginning of a length of thread, and at the end before popping it through the layers.
I also just found your site, last week. I’m really inspired by your sewing!
i love this knot, too! one less frustration = better/more crafting! especially good for quilting, as you can make your knot smaller to ‘bury’ it easily and predictably.
What a useful little tutorial! I’m going to try this on my current sewing project!
thanks for that cool info on making a knot.
who would have thought one could make making a knot look so appealing and beautiful.
I tried this knot and it works. Thanks for the tutorial, it was simple and effective.
It’s like a little bullion knot! Thanks for posting the instructions!
I’m such a huge convert to this knot… I used to do the finger twist and pull too until my quilting teacher demonstrated this one – *so* much nicer!
That’s essentially what we cross-stitchers do to make a French Knot. I never thought of doing it without the fabric to knot the end of thread. Very cool!
this is known as a taylors knot
I love this knot too. Great tutorial.
Wow! I’m a beginning quilter, and this is one to remember. Thanks for the tutorial and the beautiful blog.
Thank you very much for this very clear tutorial and your beautiful pictures.
this knot rocks!
thank you so much for the improvement to my hand sewing projects!
your blog, patterns and photos are wonderful…thank you so much.
thankyouthankyouthankyou!!! now I don’t have to make a tutorial showing how to do this knot, which I teach in my crazy quilting classes. wonderful instructions!
Thank you for the knot. I bookmarked it so I can find it again when I try to sew. I have two quilts that need their boarders hemmed, so I will use a lot of thread. Now I’m going to go look at that apron. I just found you today. Where was I when I found you? I think I was visiting someone in New York after leaving Merryville. Wow, this Bloggville is a fun place.
This is great…your blog is so inspiring…hopefully it will inspire me to sew again!
Ouissi x
Hello..
I have a new project that has the purpose of pron to spread art, who does, sell or talks about it! I would love you to be a part of it! please visit the link and click into the translation link on the right so that you can read it! Only the first post was in portuguese, the rest will be all in english!
http://www.lifever.blogspot.com
Thank you!
xx
Coxi
Very cool, Heather!!
Thanks for the handy instructions Heather!
It worked like a charm the first time! :o)
I made a tutorial for a little thumb pincushion (not the bottle cap kind)
That you might be interested in trying your hand at making.
I’d be tickled to have you stop by and tell me what you think.
Have a beautiful day and happy stitching!
Julie
Thanks! I used this about 20 times last night and was thrilled.
Such a simple little thing but ever-so gratifying. This has now become my knot of choice. Thanks for introducing me to it.
Totally, utterly wonderful! Loving the knot! Almost can’t wait to bind my next quilt so I can see how much faster it goes. Thanks, Heather!
I’d forgotten about this lovely knot – thanks for the tutorial reminder!
I have never heard of this knot before and it is brilliant! Thank you so much for sharing! I have knot-dread no more. (I was a wrap around the finger messy knot person). Each time I do it I am amazed…I am pretty sure it’s magic.
Thank you!
Thanks for sharing this knot. Your tutorial made it so easy to learn!
I *love* this tutorial. It’s so wonderfully done. Thank you! I always do the “wrap around your finger a couple times and roll it off with your thumb” thing, which works sometimes and not others.
I tried this knot a few days ago while embroidering a little face on a baby doll I crocheted, and it works so perfectly. What a lovely little knot!! *sigh*
Thank you for the tutorial!
Neat trick! 🙂
Heather, I googled Thumb Pincushion and your site came up. I cannot find the tutorial here or on Blueberry Mamas site. Where did it go? Colleen
Thank you so much for posting this. I have some days where I just struggle with getting the knot in the right and same place every time. You have saved me loads of time and frustration.
Thanks for showing us this! I am excited to learn how to make “pretty” knots! I practiced three times and every time it came out great. Thanks so much
Shorty
All hail! Thank you GOD! I just embarked on a project to make at least 1000 yo yos to make a quilt and doing the thumb rolly at the end of every yo yo was driving me crazy.
Wonderful! I demonstrated at my charity group’s handicraft meeting a week ago….they returned this week all proud of themselves with the easy knots we made all week. Thanks for sharing!
Nikki in Bosnia
THANK YOU!!! This has made my sewing go a little quicker. I do hand embroidery and always worry that my knot wasn’t tight enough or that it might unravel. This is such a quick and secure knot. So Awesome!!
Thank you Heather for this useful tip! I love this knot and I amd practicing making the pinwheel. Your blog inspire me so much. Please update it frequently so we can enjoy, share, and laugh with you
I believe this is a candle-wicking knot. A “tailor’s” knot is totally different and is used to join on a new thread. It will be very tiny, secure and will disappear within a 11o seed bead. This particular knot lays on top of the fabric similar to a french knot for embroidery.